
 Admin
Admin
How To Disable USB Port On Windows Computer To Prevent Unauthorized Access
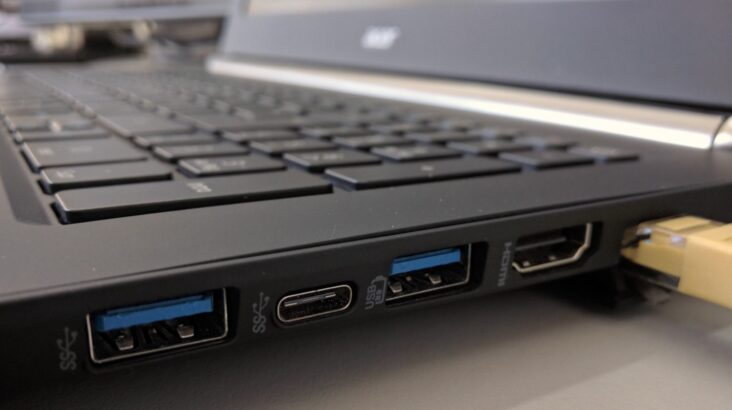
USB ports are one of the easiest ways to transfer files between computers and external storage devices. However, if you share your computer with other people, someone can connect a USB flash drive or external hard disk and copy important files without your permission.
For better computer security, Windows allows users to disable USB storage access. This prevents unauthorized users from transferring data through USB flash drives, memory cards, and external hard drives.
In this guide, you will learn how to disable USB ports on Windows computers using Local Group Policy Editor. This method works well for personal computers, offices, companies, and computers that contain sensitive information.
Contents
- How To Disable USB Port On Windows
- How To Block USB Storage Devices
- How To Enable USB Port Again On Windows
- Conclusion
How To Disable USB Port On Windows Computer
Follow the steps below carefully to block USB storage devices on your Windows computer.
Step 1: Open Local Group Policy Editor
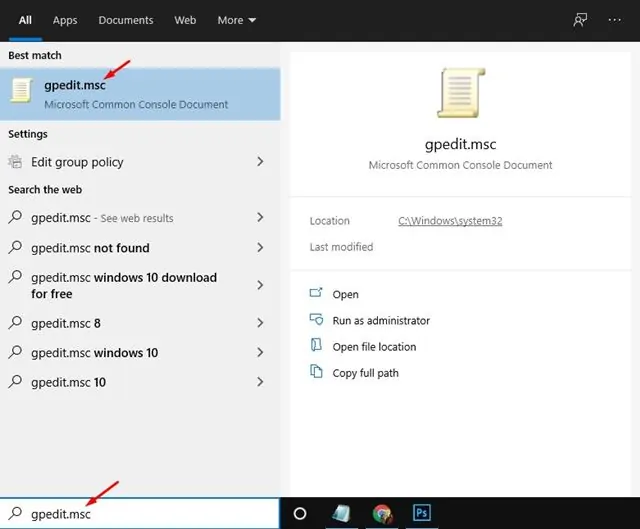
First, click on the Windows search box and type:
gpedit.msc
Press Enter on your keyboard to open the Local Group Policy Editor. This tool allows you to manage different security settings on Windows.
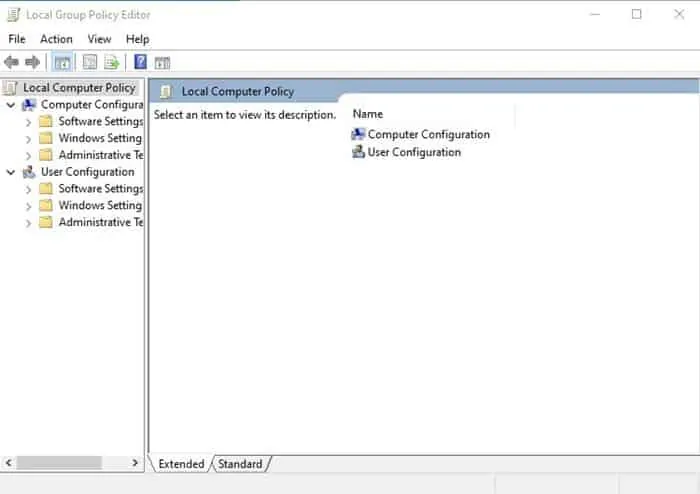
After opening it, you will see the Local Group Policy Editor window where you can configure USB access settings.
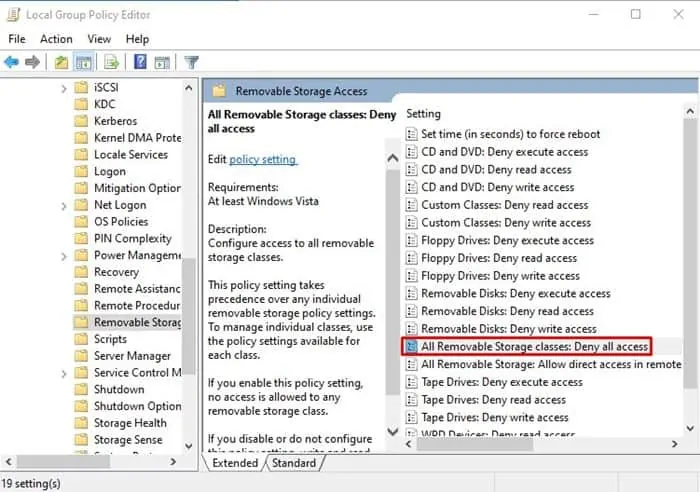
Step 2: Navigate To Removable Storage Access Settings
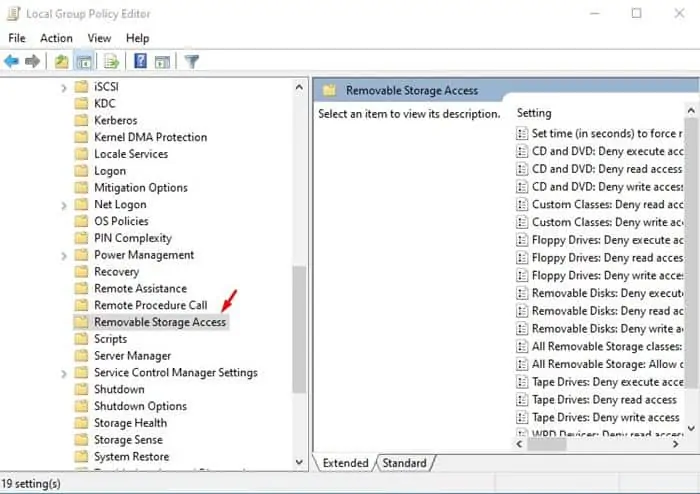
From the left menu, follow this path:
Computer Configuration
> Administrative Templates
> System
> Removable Storage Access
This section contains settings that control removable storage devices such as USB flash drives and external hard disks.
Step 3: Select USB Storage Blocking Option
After opening Removable Storage Access, look on the right side and find the option:
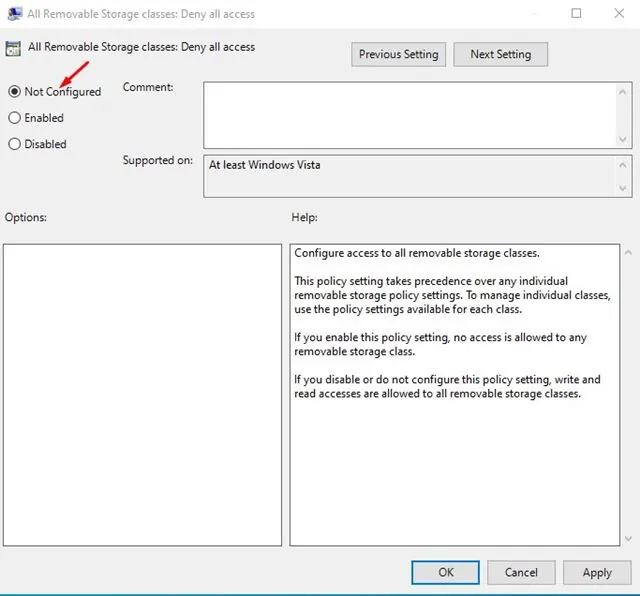
All Removable Storage Classes: Deny all access
This option blocks all removable storage devices connected through USB ports.
Step 4: Enable USB Port Blocking
Double-click on:
All Removable Storage Classes: Deny all access
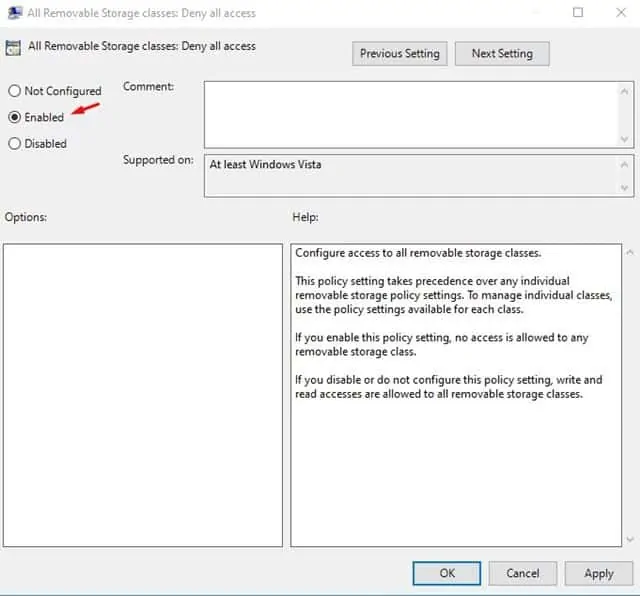
A new window will open. Select:
Enable
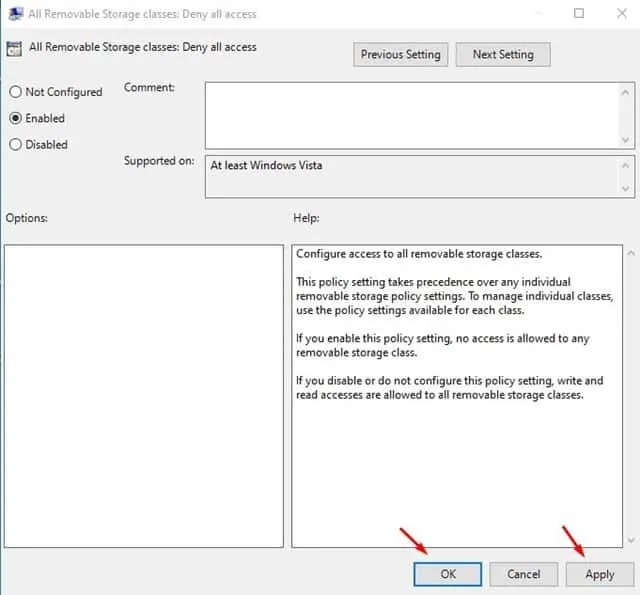
After selecting Enable, click Apply and then click OK to save the changes.
Step 5: USB Port Successfully Disabled
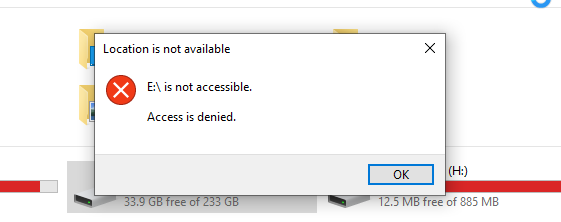
After completing these settings, all USB storage devices will be blocked on your computer.
When someone connects a USB flash drive or external hard disk, the computer may detect the device, but the user will not be able to open, copy, or transfer files.
How To Enable USB Port Again On Windows
If you want to use USB storage devices again, you can easily enable USB ports by reversing the settings.
Follow the same steps:
Computer Configuration
> Administrative Templates
> System
> Removable Storage Access
Open:
All Removable Storage Classes: Deny all access
Then select:
Not Configured
Click Apply and then OK. Your USB ports will start working normally again.
Why Disable USB Ports On A Computer?
Disabling USB ports can improve computer security in many situations. Businesses and organizations often use this feature to protect confidential information and prevent unauthorized file copying.
Some common reasons to disable USB access include:
- Preventing data theft through USB flash drives
- Protecting important company files
- Stopping malware infections from unknown USB devices
- Controlling removable storage access on office computers
- Improving Windows computer security
Conclusion
Disabling USB ports on Windows computers is a simple but effective way to protect your files and prevent unauthorized access. By using the Local Group Policy Editor, you can block USB flash drives and external storage devices without installing any additional software.
This method is especially useful for offices, businesses, schools, and personal computers that contain important information. It helps reduce the risk of data theft and prevents unwanted file transfers through removable storage devices.
If you need to use USB devices again in the future, you can easily restore access by changing the policy setting back to Not Configured.
Always combine USB protection with other security measures such as strong passwords, antivirus protection, and regular backups to keep your computer safe.

Comments
Post a Comment